In order to set up a D-Link router, you will need a D-Link router, a working internet connection and ethernet cables.
1. First you connect the DSL modem and the wireless D-Link router. You connect one end of the Ethernet cable to the DSL modem and the other end to the WAN port at the back of the D-Link wireless router.
2. Connect the wired computers to any of the other ports on the router using the other Ethernet cables
3. Open your web interface (Google Chrome, Mozilla Firefox, Internet Explorer, etc.), type https://192.168.0.1 in the address bar and hit Enter.
4. Either a popup box will appear or you’ll be redirected to a webpage requesting a username and password. Type ‘Admin’ in the username section, leave the password blank and click OK.
5. Go to the Tools Tab, and select the admin button in order to change the administrative password. Enter the new password under the Administrative heading, confirm it and click on Apply.
6. In order to increase security, you could choose to reduce the number of people using your network and if you don’t need the wireless access, you have the option to disable the wireless Local Area Network (LAN). Then go to the Home Tab, select the wireless option and turn it off.
7. In order to enable the Wireless Encryption Protocol (WEP), find the Home tab in the D-Link configuration screen and select the wireless option.
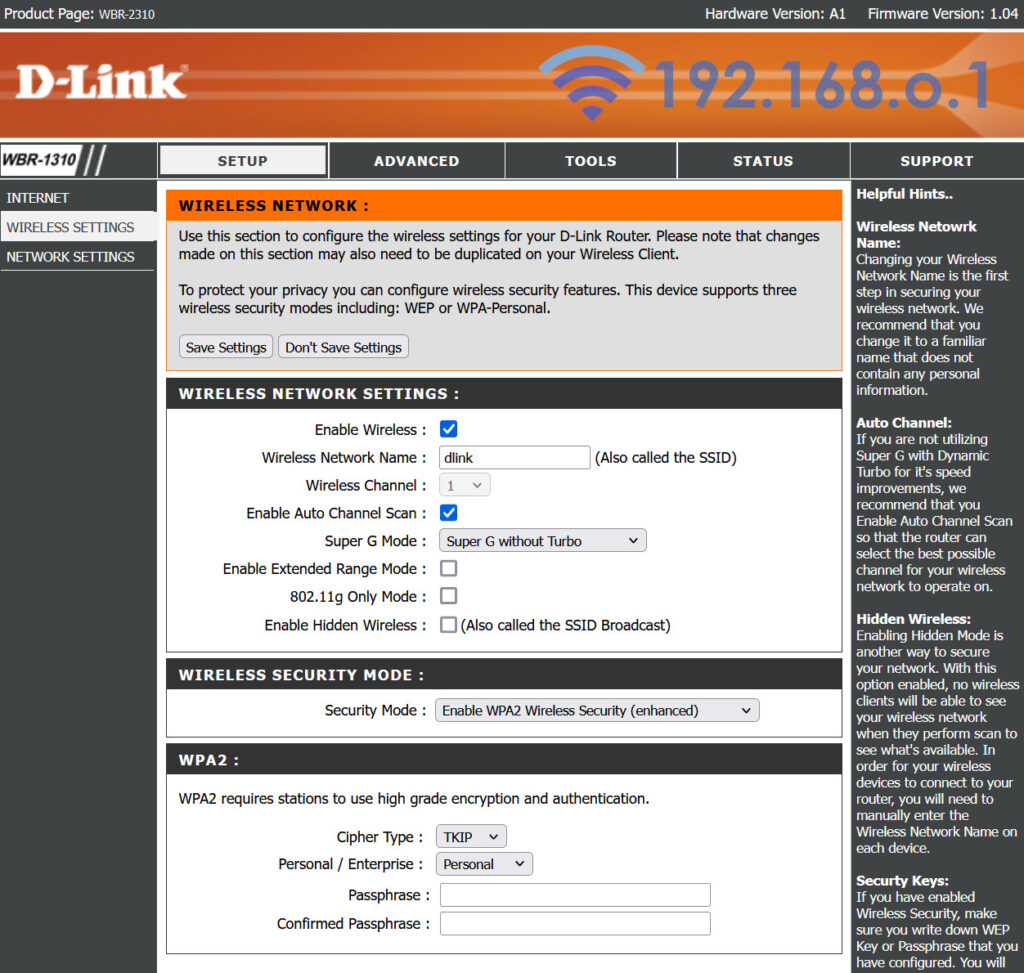
8. Choose the ‘open system’ tab and under that select the ‘enabled’ button under WEP, while setting the encryption key to ‘128’ bits.
9. Set the Key type to ASCII and choose a 13 digit password for the Key – 1 field.
10. Enter the password in a secure location and click APPLY.
This is how you set up your wireless D-Link router and configure the WEP settings. in order to increase the difficulty of locating your network, change the default SSID.
11. Go back to the Home tab of your D-Link configuration screen and select the Wireless option.
12. Change the default SSID to one of your choice and click apply.
13. Lastly go to the Advanced tab, select performance and choose the Disabled box in order to Disable SSID broadcasting.
14. Click apply to confirm the changes and enable a safer and personalized browsing experience.
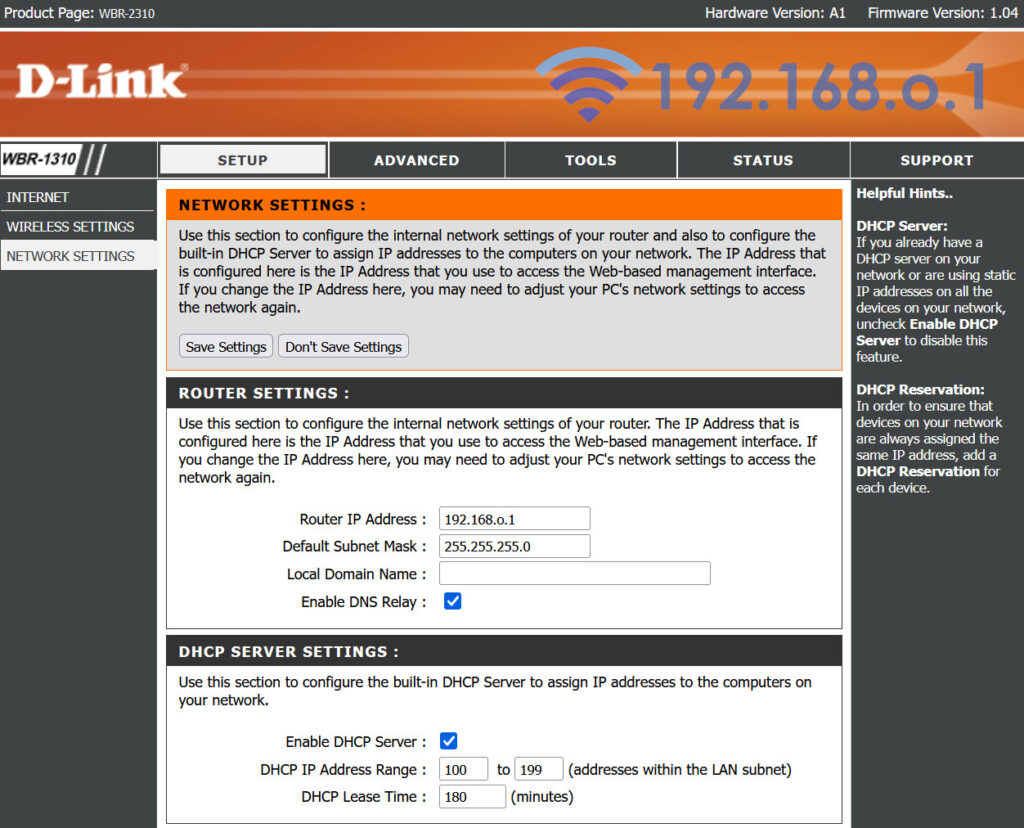
15. To change the router IP Address go to the following screen:
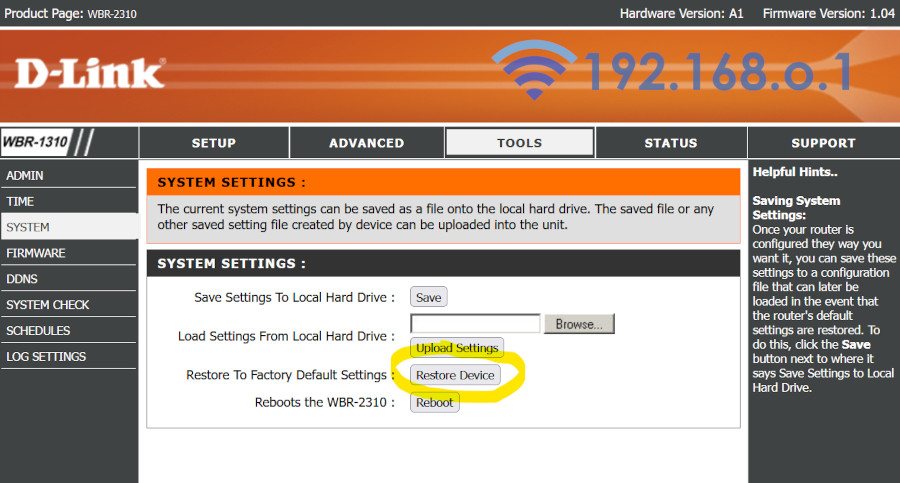
16. In order to reset the router’s default settings do the following: